By Barbara LaMonica
Perhaps you have a collection of old family photographs from your ancestors that you cannot precisely date or identify. Whether you are a family historian or professional genealogist, being able to identify photos as to the who, when and where can provide many clues to family history.
erhaps you have a collection of old family photographs from your ancestors that you cannot precisely date or identify. Whether you are a family historian or professional genealogist, being able to identify photos as to the who, when and where can provide many clues to family history.
There are several steps to take in order to decipher a photograph’s clues. The first is to identify what type of photograph it is, as photography and photo processing has undergone several changes over the years. You may have a paper print or an historical image such as a daguerreotype, ambrotype, tintype, or cabinet card. Even though many of these techniques overlap each other in time, each type is primarily identified with an historical period narrowing down the date of your photograph. You can line up dates with a family tree.
The first thing to do is simply look at the back of the photo for any written notes depicting date and/or names of persons. Additionally, the date may be stamped on the back by the processing company. Older photos such as cabinet cards, daguerreotypes or tintypes may have the name of the studio where the photo was taken. You can do further research on the studio location, photographer, and years in business. The New York Public Library website has a Photographer’s Identities Catalog (PIC) which provides data on photographers, studios, and manufacturers. This is an excellent online resource for family historians and genealogists. The link is below.
PIC – Photographers’ Identities Catalog
Daguerreotypes- Beginning in the 1840s daguerreotypes were the first photographs successfully marketed to the public. The image is actually a metal object. It is a copper plate which has been coated with highly polished silver and exposed to vapors making it light sensitive. The plate is then inserted into a camera and exposed. Daguerreotypes are placed in hinged cases to protect the fragile silver image from scratching. They are often lined with velvet or silk and made of wood or composite material such as wood resin or shellac. If your photo is a daguerreotype is it will have a shiny mirror like finish, and the image should be sharp and highly detailed and is in a protective case. To verify it is a daguerreotype rotate it from left to right in bright light and at a certain angle the image will resemble a negative.
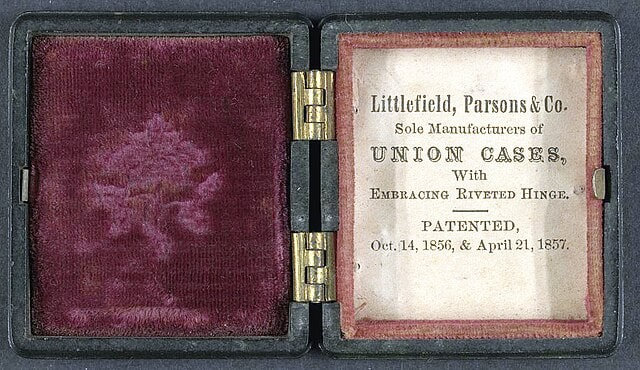
Ambrotype- By the 1850s another photographic process was introduced which was cheaper and easier to produce. The ambrotype was a positive image produced on a glass which was coated with a light sensitive emulsion exposed to light. They were also in a protective case similar to the daguerreotype cases. Ambrotypes can be identified by the glass plate on which there is a positive image.
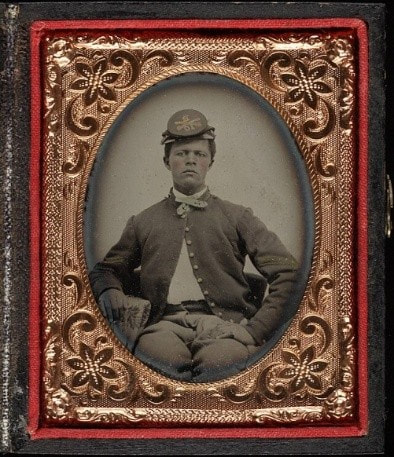
Tintypes- Images created on a thin sheet of iron which is coated with a dark lacquer with light sensitive silver nitrate emulsion which is exposed in the camera producing a positive image. Most popular during the 1860s and 70s. The Civil War period was the apex of the tintype because they were quicker to process, more durable and less expensive than either the daguerreotype or ambrotype. Portable studios were even set up in the fields so soldiers could pose for photos to send back home. An easy way to tell if your photo is a tintype is to hold a magnet against it and if the magnet sticks it is a tintype since the image is on iron. They can be cased or uncased.
One thing to remember is that the above processes all consisted of flat smooth surfaces which were treated to produce an image which was then given to the customer. All images were therefore one of a kind. There was no such thing as a negative which could be used to produce the same image over and over. But by the mid-19th century well into the 20th century glass negatives became popular. Images are created on a thin piece of light sensitized glass rather than on metal or film. When placed in a camera and once developed the negative image on the glass could be used to create a positive print on a piece of photographic paper and thus used again to produce multiple copies.
Carte de Visite- Or visiting card originated in the 1860s in France where it became popular to exchange calling cards with one’s portrait on it. The paper was cheap and the glass negative could be used over and over again. Small in size, albumen, brown sepia tone, mass produced, and mounted on card stock. Popular from 1860s to 1880s.
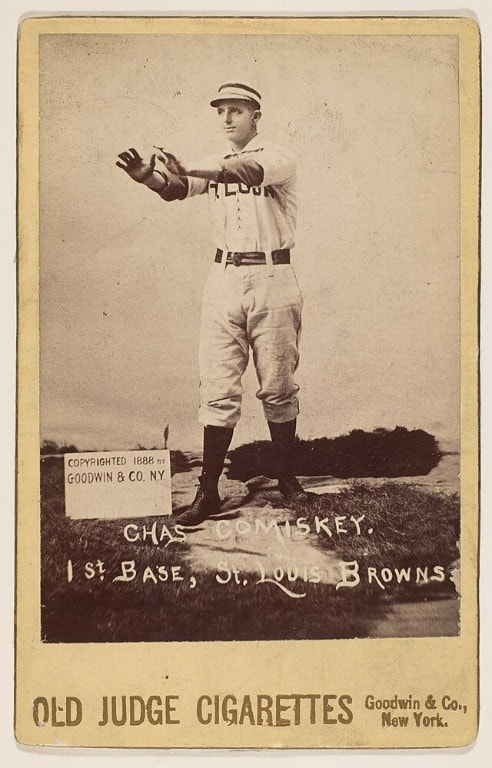
Cabinet Card-Late 19th-early 20th century. Same sepia tone but larger formats. New binding substance collodion and gelatin replace albumen giving more contrast and richer tones. More luxurious card stock, various designs and shapes, scalloped edges, gold boarders. Meant to be displayed in a cabinet. Some of the earliest baseball cards were cabinet cards on thick cardboard, often used as product promotion.
See below.
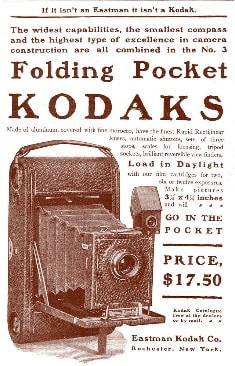
At the turn of the century a flexible plastic material treated with light sensitive silver salts is invented. Coincident with this Kodak comes out with a small portable camera enabling casual photography by the masses. By the 1920s the glass negative is totally replaced by film.
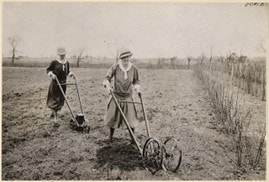
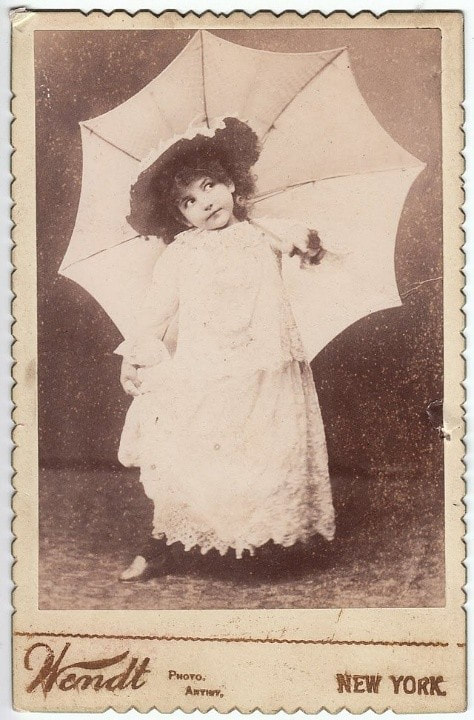
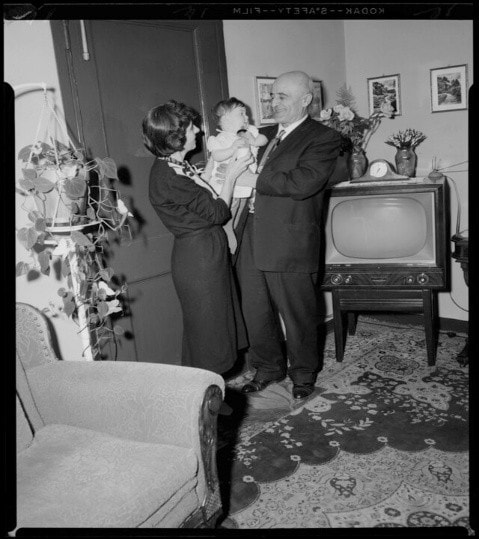
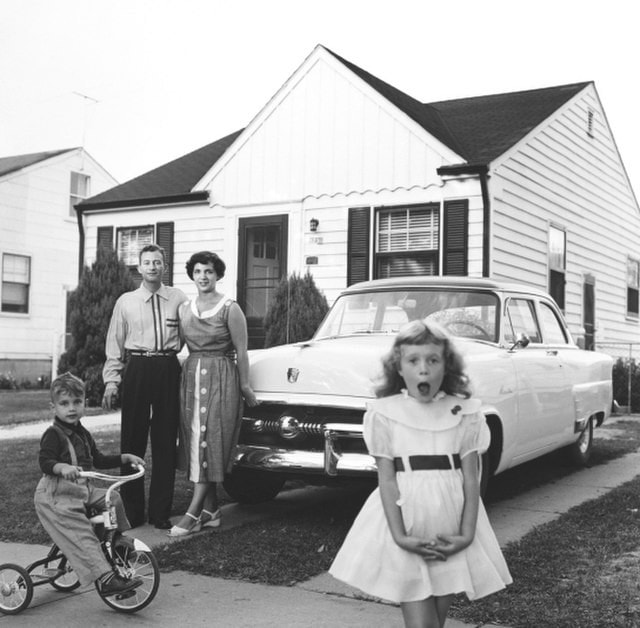
Photography is finally available to everyone as the smaller cameras and film stock are light, portable, and affordable. Suddenly everyone was taking photographs of everything from travel to family gatherings. The photographs are more casual, no more rigid portraits in nondescript backgrounds. People are captured in living rooms, yards, and streets. This affords many ways to identify place and time. If you are lucky, photos are in albums with dates, names and places. For those stashed in no particular order in boxes or drawers you have to “read the photo.” On the back the processor may print the date of development. Look at the image. Study fashion, hairstyles, objects in the frame such as furniture, televisions, phones. If it is a street photo study the buildings or businesses and you may see street names.
Can you date the photos below?

*All Images Wikimedia
Here are just a few books and online resources you may consult.
Fashion History Timeline- Fashion History Timeline | A hub for fashion research
Automobiles- 100 Most Collectible Cars: Timeless… book by Publications International
Film formats and photo sizes- A Guide of Popular Film Formats – The Darkroom Photo Lab
Telephone Archive- Antique and Rotary Dial Telephone Makes and Models | Telephonearchive.com
Collector’s Guide to Vintage Televisions- Collector’s Guide to Vintage… book by Bryan Durbal